Thursday, April 30, 2009

[C/C++] New to C Programming Language Part 2(WIP)

LKS is not good at English. Without a reference book in English, it's hard to write and explain the guidance in English. If there is any wrong grammar or misspelling vocabulary, please don't blame LKS too harshly.

  • Compiling

First program “Hello C”
This is a typical code in learning C programming language

#include <stdio.h>
#include <stdlib.h>

int main(void)
{
printf("Hello world!\n");

system("pause");
return 0;
}


Save the code as hello.c

  • Brief explanation

#include
Includes a file called stdio.h which lets us use certain commands.

int main()
“int” is called the return value.
“main” is the name of the point where the program starts.

{}
The two curly brackets are used to group all the commands together so it is known that the commands belong to main.

printf("Hello World\n");
This is the printf command and it prints text on the screen.

return 0;
The “”int” is short for integer. We need to use the return command to return the value 0 to the system to tell it that there were no errors while the program was running.

LKS will write another tutorial about the detail of C …

Now is the time for Compiling.
Open up the command line (cmd.exe) and set the current directory to where your code file is.

Type the command
gcc hello.c -o hello.exe

-o <file_name>
Place the output into <file_name>.
Default the output file would be a.exe.

LKS notices that you should add a new line at end of code in every code or you will get a message like this

hello.c:X:X: warning: no new line at end of file

Working In Process...

Wednesday, April 29, 2009

[C/C++] New to C Programming Language Part 1

Hi~~My fellow brothers~~

First of all, I, LKS, would like to take this opportunity to express my heartfelt appreciation to Xin-Yu for inviting me to joining this Blog(import Code.*; ). LKS fell very fortunate to have chance to work and assist in making the Blog successful. Again, thank you so much for your enthusiastic participation in this Blog. Without your professional assistance, this Blog would not have come to fruition.

Best regards,
Your Friend, LKS
2009/04/29
---------------------------------------------------------------------------------------------------
This guidance aims to teach an idiot like LKS to LEARN C...
(LKS knows that you are NOT like me,aren't you?)

Quick Start Guide to C
  • Table of Contents
  • Installing MinGW on Windows
This section describes the installation procedure for MinGW as detail as LKS can. If you want to know more target specific installation instructions. Please go to MinGW official site.

  • What is MinGW?
MinGW, "Minimalist GNU for Windows", is a port of the GNU Compiler Collection (GCC), and GNU Binutils, for use in the development of native Microsoft Windows applications.

  • Installing MinGW on Windows
If you're new to C, LKS suggests that wxDev-C++ might come in handy. But if you guys want to heard “the sounds of the keyboard” just like LKS. Well...MinGW is one of candidate you might take in consider.

  • Using the automatic installer
Instead of wasting time for installing MinGW Manually, LKS recommends that using installer is much easier way. (Hmmm...LKS is a slothful person...)If you want to try, there is a very detailed Tutorial on the MinGW official site.

Download an Installer executable "MinGW-current-version.exe" and run it

The Installer will install all you need to compiler C. Well...The versions of the individual packages may not be the latest. But for the beginner as LKS, there is no need to use the latest features. Once you have all these packages (mingw32-make is optional if you have MSYS or Cygwin), you may download updated individual packages, like GCC, and extract them into the MinGW directory.

  • Environment Variables Setting
Here LKS consults the Xin-Yu's Blog.
[GCC] GCC for Windows (MinGW/DEV-C++)

This is easy done by adding the directory address to the PATH variable in your environment Variables. Go to “System->Advanced->Environment Variables” to edit the Path value. You will see entitled "System Variables". Find the line that notes "PATH" and double-click the entry. A dialog box with two text boxes will pop up, the bottom text box is where you should edit. At the end of the string add ";X:\MinGW\bin"(X should change to the driver which you installed). Don't forget the semicolon ; this separates the entries in the PATH. And now you should use “gcc” directly in command-line.

Continue...

Tuesday, April 28, 2009

[Java] 簡單程式星星三角形

public class work {
public static int i;
public static void main(String args[]){

String a="*";
System.out.println(a);
for(i=1;i<7;i++){ a="a+">

因為先從基本的開始練習,所以我把我剛練習完成的程式放上來,雖然很簡單不過我會繼續努力的.
如果有更好的寫法,希望可以交流一下,或者是我哪裡寫錯請一定要糾正.謝謝

Friday, April 24, 2009

[Xcode] Xcode HowTo

Introduction:
Xcode is a suite of tools for developing software on Mac OS X, developed by Apple.
Xcode is a IDE for programming languages, such as C/C++,Java, python,Ruby and Perl etc.

Download:

Download Xcode there.
(register for free!)

Installation:
Click “xcode312_2621_developerdvd.dmg” to install.
(your version maybe different with mine)

Run Xcode:
Click “Xcode ” to run it.


Create a C Project:
Click “File->New Project”


Select “Command Lin
e Utility ” and click “Standard Tool”


Coding:
Show the “Hello, World!” message in console.


Compile and Run:

Click “Build->Build and GO(Run)”
You can see the output message in your console.

Sunday, April 12, 2009

[Flex] Calendar

Introduction:

Creating a calendar in Flex is just as easy as in Qt.

Create a Flex Project for Calendar:

Click "File->New->Flex Project" to create a empty flex project.
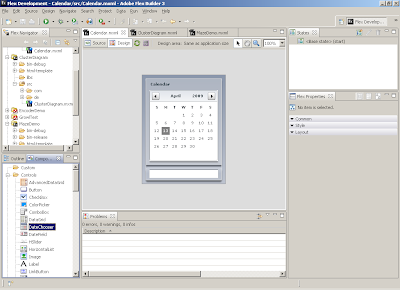
In Design mode, drag a DateChooser and a TextInput component on your design area. and given the corresponding name and configuration to each instance.

Coding:

In this example, we just implement a very simple feature. Displaying the date information on textinput when user choose a day. Below is the whole source code for this example:

<?xml version="1.0" encoding="utf-8"?>
<mx:Application xmlns:mx="http://www.adobe.com/2006/mxml" layout="absolute" backgroundColor="0xCCCCCC" backgroundGradientAlphas="[1.0, 1.0]" backgroundGradientColors="[#8B97AC, #BDC3CF]" width="215" height="280">
<mx:Script>
<![CDATA[
private function onDateSelected():void{
var date:Date;
date = dateChooser.selectedDate;
dateOut.text = date.getFullYear()+"/"+(date.getMonth()+1)+"/"+date.getDate();
}
]]>
</mx:Script>
<mx:VBox left="10" top="10" bottom="10" right="10">
<mx:Panel width="100%" height="221" layout="absolute" title="Calendar">
<mx:DateChooser id="dateChooser" x="0" y="0" textAlign="center" change="onDateSelected()" width="100%" height="100%"/>
</mx:Panel>
<mx:ApplicationControlBar width="100%" height="100%">
<mx:TextInput id="dateOut" width="100%"/>
</mx:ApplicationControlBar>
</mx:VBox>
</mx:Application>


Compile and Run:

Click "Run" to compile and run your project.


Conclusion:

Generally, people use DataChooser component for the online reservation application. Thus, user just need to choose a day instead of typing it themselves.

[Flex] Flex Builder

Introduction:

Adobe Flex Builder is the productive development tool which based on eclipse. The first version was released in 2006. It soonly become the standard of the web application development after two years. The main programming language for flex builder is actionscript, so the flash developer can easily get with it. As we know, the flash media can be played on cross-platform(thanks to the multi-platform flash player), however, the flex builder can only fully support the windows operating system (Flex Builder for linux is still under experientment). To know more about Flex Builder, please visit the official website.

To get the trial version of Flex Builder 3, please click here

Getting Started with Flex:

If you have the experience with eclipse, you don't need to spend long time for learning the basic operation in flex. To create a flex project, you just need to click "File->New->Flex Project". It's just as simple as in eclipse. I think the most difficult part is to get familiar with Actionscript (The powerful script language for developing flash media).

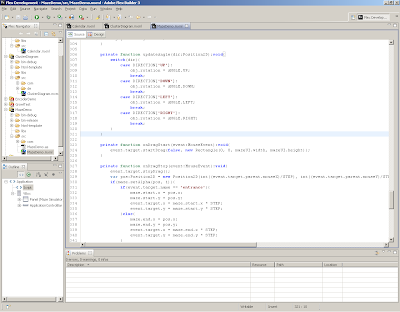
In flex, there are two designing mode, "source" and "design" mode. For UI design, I would like to use "Design" mode instead of the "Source" mode. In "Design" mode, what you see is what you get. The programmer can save more time to design their owe user interface. It can be done in few steps.


Flex Builder inherit the advantages of eclipse, it also can be integrated with PHP, ASP etc, not just limit to ColdFusion. For other web application designer, they can still get the benefits from using Flex Builder.

If you are looking for some flex tutorial, Adobe Flex online training video might suit for you.

Flex in a Week

Reference:

Adobe.com

Flex Builder 3 features
Adobe Flex Builder Linux Public Alpha
Flex in a Week
Adobe® Flex™ 3.3 Language Reference

Monday, April 6, 2009

[Qt] QCalendarWidget

Introduction:

Qt provides lots of useful widgets for developer. The programmer just need to know how to use it in their own project. Today, I want to give a briefy demonstration for the use of the QCalendarWidget.
  • Project: Qt Simple Calendar
  • Skill Requirement:Basic C++ and Qt
  • Difficulty: Beginner
Create a Project:

Create a Qt gui project, and edit your ui file. Drag a Calendar widget from Qt Widget Box to your Qt Designer Editor. We also need three labels and three LineEdit.


then, click the "Edit Signals/Slots" to setup a slot.


Select the "clicked(QDate)" slots and click the right-hand side's "edit" button to setup a function name - "onDateSelected(QDate)" for the slots. Cause the slots will pass a QDate object to your slot handler, so don't forget the parameter type.

Coding:

Edit your header file and add the slot into your header.

#ifndef SIMPLECALENDAR_H
#define SIMPLECALENDAR_H

#include <Qtgui/QWidget>
#include "ui_simplecalendar.h"

class SimpleCalendar : public QWidget
{
Q_OBJECT

public:
SimpleCalendar(QWidget *parent = 0);
~SimpleCalendar();

public slots:
void onDateSelected(QDate);

private:
Ui::SimpleCalendarClass ui;
};

#endif // SIMPLECALENDAR_H


Edit your class source code. When the clicked signal was emitted, this program will show the year, month and day on their own Line Edit.

#include "simplecalendar.h"

SimpleCalendar::SimpleCalendar(QWidget *parent)
: QWidget(parent)
{
ui.setupUi(this);
}

SimpleCalendar::~SimpleCalendar()
{

}

void SimpleCalendar::onDateSelected(QDate qdate){
QString str;
ui.yearLine->setText(str.number(qdate.year(),10));
ui.monthLine->setText(str.number(qdate.month(),10));
ui.dayLine->setText(str.number(qdate.day(),10));
}


Compile and Run:

Right-Click your Qt project to compile it. Your program could be similar to the screenshot.


Conclusion:

It's quite simple and efficient for creating a calendar in Qt.
If you want to know more about the QCalendarWidget or other widgets. Please visit Qt Reference Documentation.

[Eclipse] Qt Eclipse Integration for C++

Introduction:

Even though Qt has its own powerful IDE tool - QT Creator, I still prefer to use eclipse for developing QT programs.

Installation:

The basic requirements for installing the plugin are Eclipse and CDT. You can get the related software from these two posts [Eclipse] Eclipse HowTo [Eclipse] Integraded with C/C++.

Download Qt Eclipse Integration for C++ here

Unpack the archive to your eclipse folder and restart the eclipse.

Create a New Qt GUI Project:

After the installation completed, click "File->New->Project->Qt Gui Project". Click "Next" to continue.


Given a name for your project and click "next" to continue.


Select a UI type to inherited. In this example, I choose the QManWindow.


Select some modules or just leave it as default. Click "Finish" to create the project.

Coding:

Qt is a object orientation framework, so you must be familiar with object orientation programming. To getting started with the QT API, please see the official Qt tutorial

http://www.qtsoftware.com/developer/getting-started

Compile and Run:

Right-Click your Qt project, and choose the "Run As", click "Local C/C++ Application" to compile and run the Qt program.

Qt make GUI design easier, hope you will love it.

Sunday, April 5, 2009

[C++] Universal Calendar

1.簡介
萬年曆這是最輕鬆平常的小工具,雖然看似不難,但對初學者有一定的難度,他可以訓練你邏輯,作者原本想以Java來完成的,但不諳Java,所以暫時以C++來呈現,過段時間在補上Java的版本。

2.Code
#include<iostream>
#include<stdlib.h>
using namespace std;

int w;
void week(int y)
{
y--;
w=y+y/4-y/100+y/400+1;
w%=7;
}

int main(void)
{
int i,j;
int year;
int day[13]={0,31,28,31,30,31,30,31,31,30,31,30,31};

cout<<"Input year:"<<endl;
cin>>year;

if((year%4==0 && year%100!=0) || (year%400==0))
{
day[2]=29;
}

week(year);//計算第一天為星期幾

for(int k=1;k<=12;k++)
{
cout<<"Sun\tMon\tTue\tWed\tThu\tFri\tSat\t"<<endl;
for(i=1;i<=w;i++)
{
cout<<"\t";
}
for(j=1;j<=day[k];j++)
{
cout<<j<<"\t";
w++;
if(w==7)
{
w=0;
cout<<"\n";
}
}
cout<<"\n"<<endl;
}

system("pause");
return 0;
}

[Eclipse] EPIC - Eclipse Perl Integration

Introduction:

For some Perl programmers, they would like to develop their Perl program in eclipse. EPIC is a package to integrate Perl into eclipse.

Installation:

Before installing EPIC you need Eclipse, Java SDK, and ActivePerl on your system.
  • start your eclipse
  • click "Help-> Install New Software"
  • click the "Add" button, then
  • Click the "Archive" button
  • enter the location: http://e-p-i-c.sf.net/updates
  • click OK to continue install it

Create a Perl Project:

After install and restart eclipse, Click "File->New->Project->Perl Project". Click "Next" to create it.


Click "File->New->Project->Perl File", Click "Next" to continue


Choose your perl project and given a name for your perl file(including .pl extension)

Coding:

Below is a very simple Perl code to show the "Hello Perl" message on console.

print 'Hello Perl'

Compile and Run:

Right-Click your Perl file (HelloPerl.pl), and choose the "Run As", click "Perl Local" to compile and run this simple Perl program.

Your output message must be a "Hello Perl" sentence, otherwise you might make some mistakes during the configuration.

It's done. Enjoy it!

Saturday, April 4, 2009

[Java] 建立整數亂數

public class RandInt{
public static void main(String args[]){

int a=0;
a=(int) (Math.random()*10); //why do i use (int) in Math.random?

System.out.println(a);
}
}

[Eclipse] Integrated with C/C++

Introduction:

Eclipse provides many good features for programmers. For instance, the "Auto-Complete" will remind programmers of the methods or properties of the class. In the very beginning, eclipse can only support Java language. Now, for C/C++ programmers, they also can get benefits from using the awesome tool.

Download CDT:

Before install CDT, you need a eclipse installed in your system. If you don't have it, please see the previous post to install it[Eclipse] Eclipse HowTo

Download CDT 5.x for Eclipse 3.4x

Download CDT 6.x for Eclipse 3.5x or higher

Installation:

start your eclipse, click "Help-> Install New Software",click the "Add" button, then, Click the "Archive" button, select the CDT archive you had downloaded. Click "OK" to install the plugin.

Create a C/C++ Project:

Click "File->New->Project->C Project",

and click "Next" to continue


given a name for the project and select the "Hello World ANSI C Project" as your project type. Click "Finish" to finish it.

After creating the project, you will see the workspace which is similar with the above screenshot.

Compile and Run:

Right-Click the "HelloWorld" Project, select "Run As->Local C/C++ Application",the output message would be displayed on console panel.

Enjoy It!

[Eclipse] Eclipse HowTo

Introduction:

Eclipse is a integrated development environment for various popular programming languages, such as Java, C/C++, python and Perl etc.

Download:

Download the eclipse here

Best version for beginner: 3.4.2

(use the latest version at your own risk!)

Installation:

Unpack the archive to the location you want. Before running the eclipse, make sure you have had installed the java JDK in your system. If not, download and install it.

Download Java SDK here

Run Eclipse:

Click "Eclipse" to start it.

(your eclipse might have a little difference with mine.)

Create a Java Project:

Click "File->New->Project"

Select "Java Project"

Create a Java Class:

Click "File->New->Other..(or press Ctrl+N)"

Select "Class" and click "Next" to continue.

given a name for new class and click "Finish" to finish to create the new class.

Coding:

Follow are the simple code for displaying the "Hello Java" message in console.

public class Hello {
public static void main(String args[]){
System.out.println("Hello Java!");
}
}

Compile and Run:

Right-Click your source code "Hello.java", select "Run As -> Java Application".

you probably can see the output message in your console panel.

You can visit eclipse's official website for more detail information.

http://www.eclipse.org